Master Class - Ceramic Surface Decoration
This is the beginning of a six week surface decoration course in collaboration with the ceramics department. I'm really looking forward to exploring new ways of translating my marks and images to a medium I am not very familiar with. It will be interesting to see how I might apply my ideas to ceramics in the future.
First day of the course. Great fun back to playing and exploring new medium.
random marks using tools and fingers
mark making after coating damp tile with slip
textures made by tools - it will be interesting to see the texture/colour of the transferred clay on top of the slip will fire
creating depth - shapes stamped in shapes and interesting repeat using hook tool
stitch qualities created by metal tool and hand drawn mark and lines drawn by variety of tools - interesting how the slip has created additional furrows next to the mark.
Week two and three:Slip decoration and mono printing
This week we were introduced to using slip (liquid clay) and scraffito techniques.
I love the colours of the slip clay, muted, soft and subtle. However I know the colours will change after firing to quite strong colours. It would be good to have the time to explore the range of colours available and how they react to glazes, however I'm learning that any aspect of ceramics can be very variable and technical and a single element can take years to fully understand - pity I've only got six weeks!

Before and after - Slip trailing is an art! looks simple but needs huge amounts of control. I was really surprised and please with the result of this test tile. I really liked the background which I had painted with a large brush, thought the contrast of splashes and slip trailing created good contrast.
Scraffito created using a deconstructed pen and clay tool. Slip was applied using sponges and brushes to create a range of decorative marks.

Mixture of slip trailing, scraffito and sponging. Final effect was quite dark but created a much more pleasing effect than anticipated. It's fascinating how the fired pieces change so much and illustrates how well you need to know your materials to recreate specific effects.


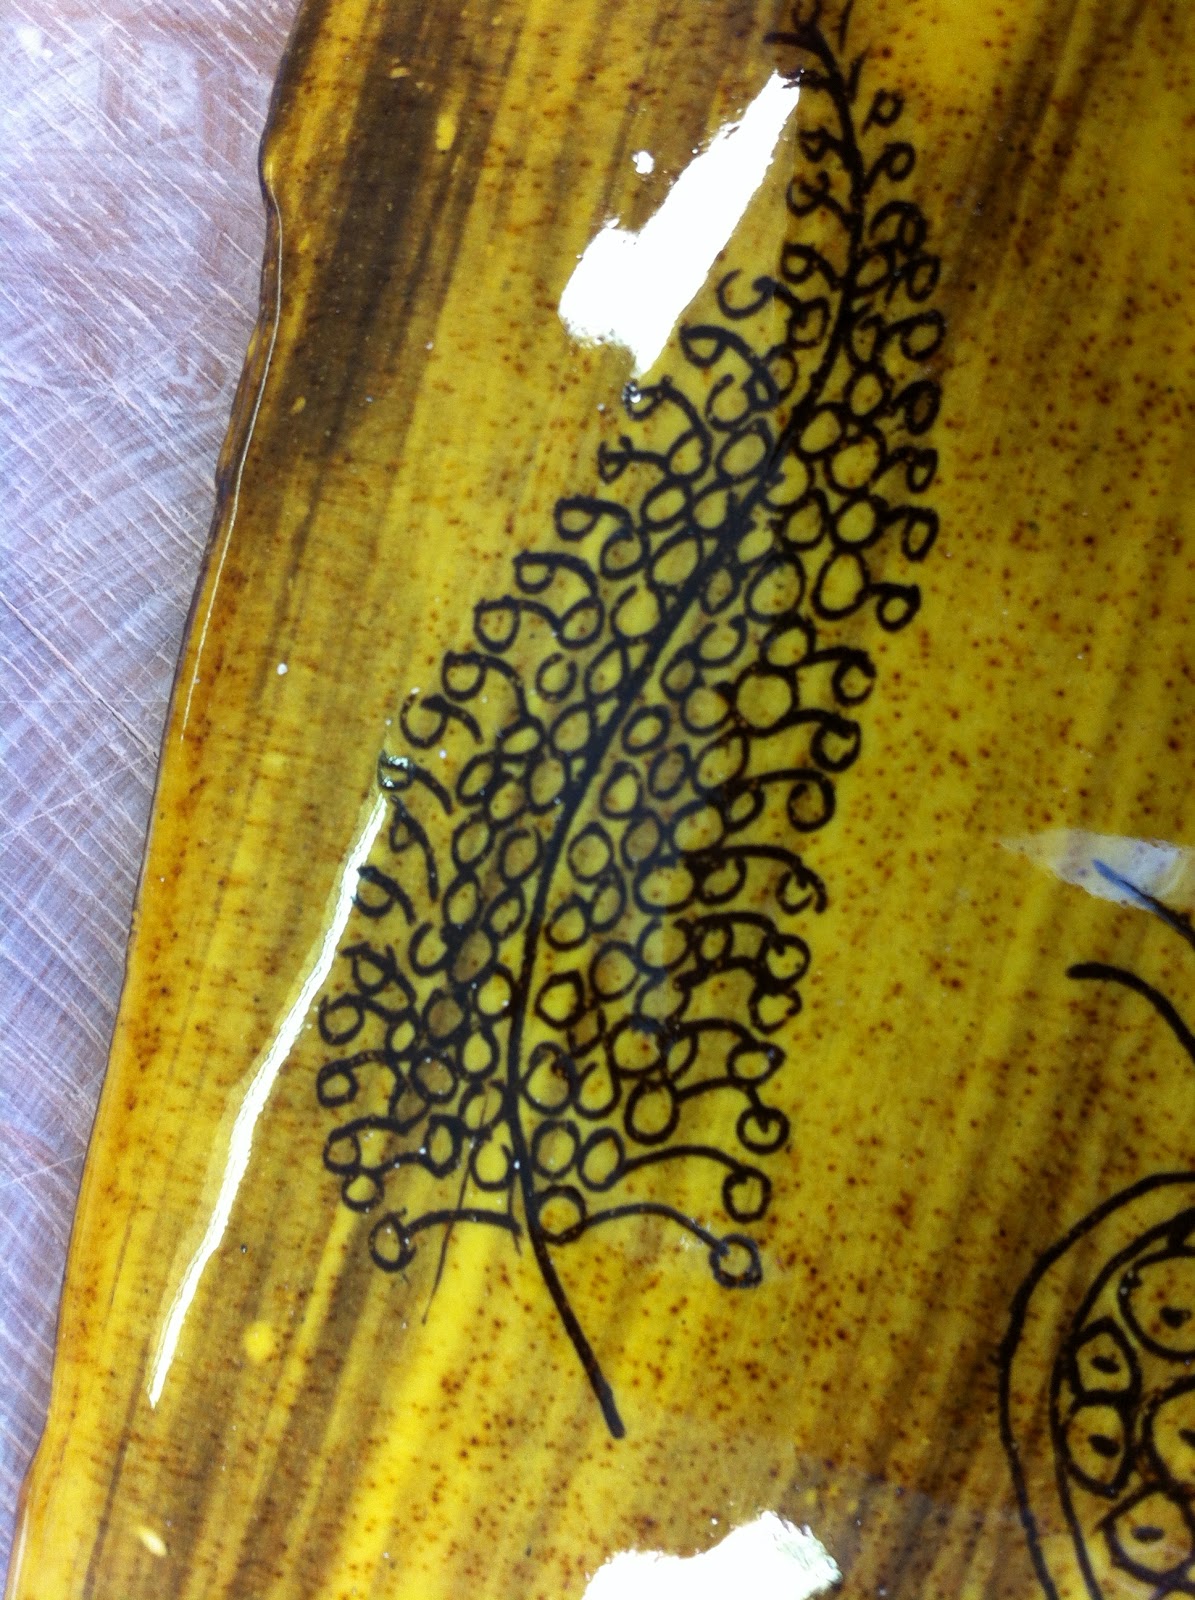
This was a pleasant surprise as the original scraffito marks looked insignificant and dull. However after firing using a honey glaze the images have a surprising amount of life and depth. I was very impressed with the amount of detail picked up from the very fine lines I scratched into the slip.

Mono printing involves layering slip onto a base of paper using slip trailers and brushes. Left to dry for a short while, they are then applied to air dried clay tiles and pots.
I liked the resulting effects of this technique as it can create very drawn and painterly marks onto the unfired clay surface
Applied mono print - Layers need to be built up from the first colour up. In this respect it is a little like screen printing in that you need to think about layers of colour.
I like the grungy effect created by the print not being 100% attached to the tile surface.

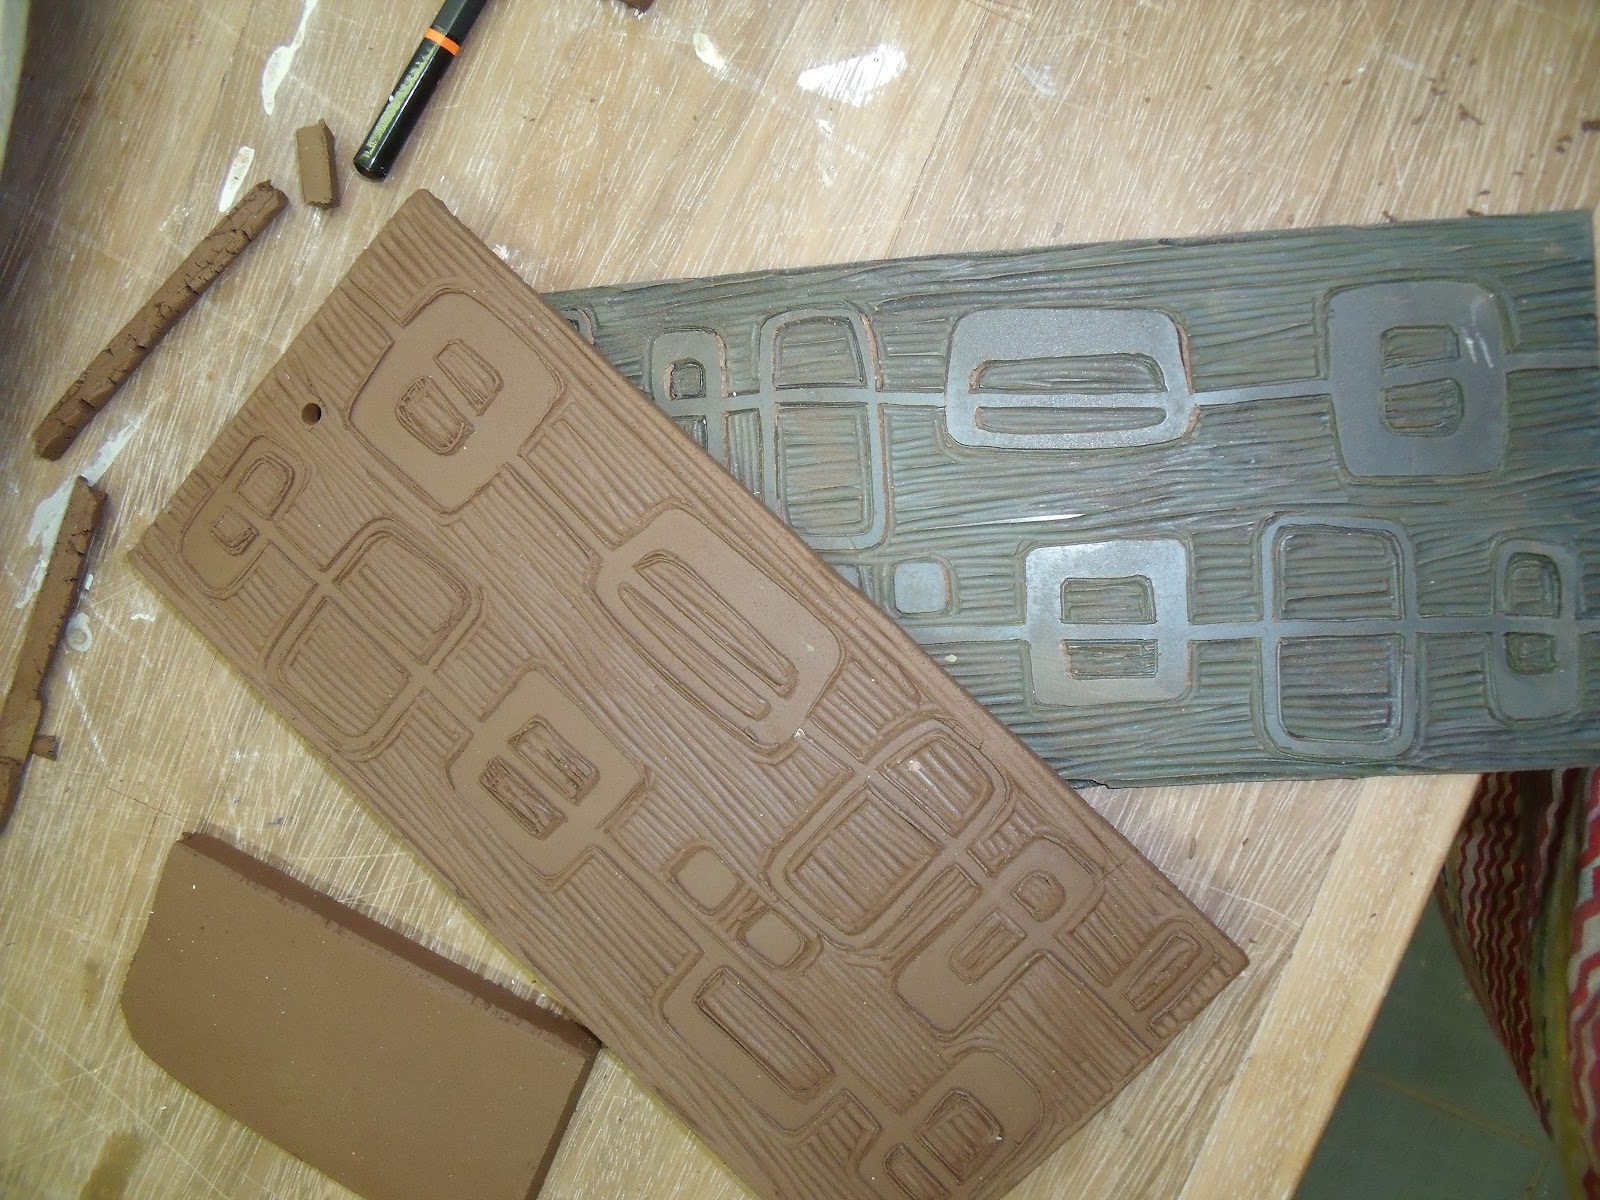
Example of using a lino printing block as a clay embossing tool.
Weeks four, five and six
In week four we explored inlay - this is a combination of scraffito and slip. Lines are etched into the clay surface which is then infilled with slip and scraped back to create a clozone effect. These pictures show a mixture of tiles using inlay and stencils.
In week five we were given free range to explore any of the techniques we had learned over the previous weeks. I had been researching ceramicists of the 50's and had come across the technique of using stencils which I tried on a range of tiles and bowls.
The final technique we used was to apply a decal to pre-glazed tiles. Decals are images which have been created either by hand in the form of drawing or painted images which are then scanned into a digital format and printed onto specially prepared film which after soaking in water can be transferred onto fired surfaces. We used decals left over from an old project to experiment with - I tried cutting them up to create a mosaic effect that was different from the original design.
The decals can be quite expensive to have reproduced but I can see how I might use these in future products in transferring my images onto ceramic items.